How to Waterproof Walls for Moisture When Installing Tiles
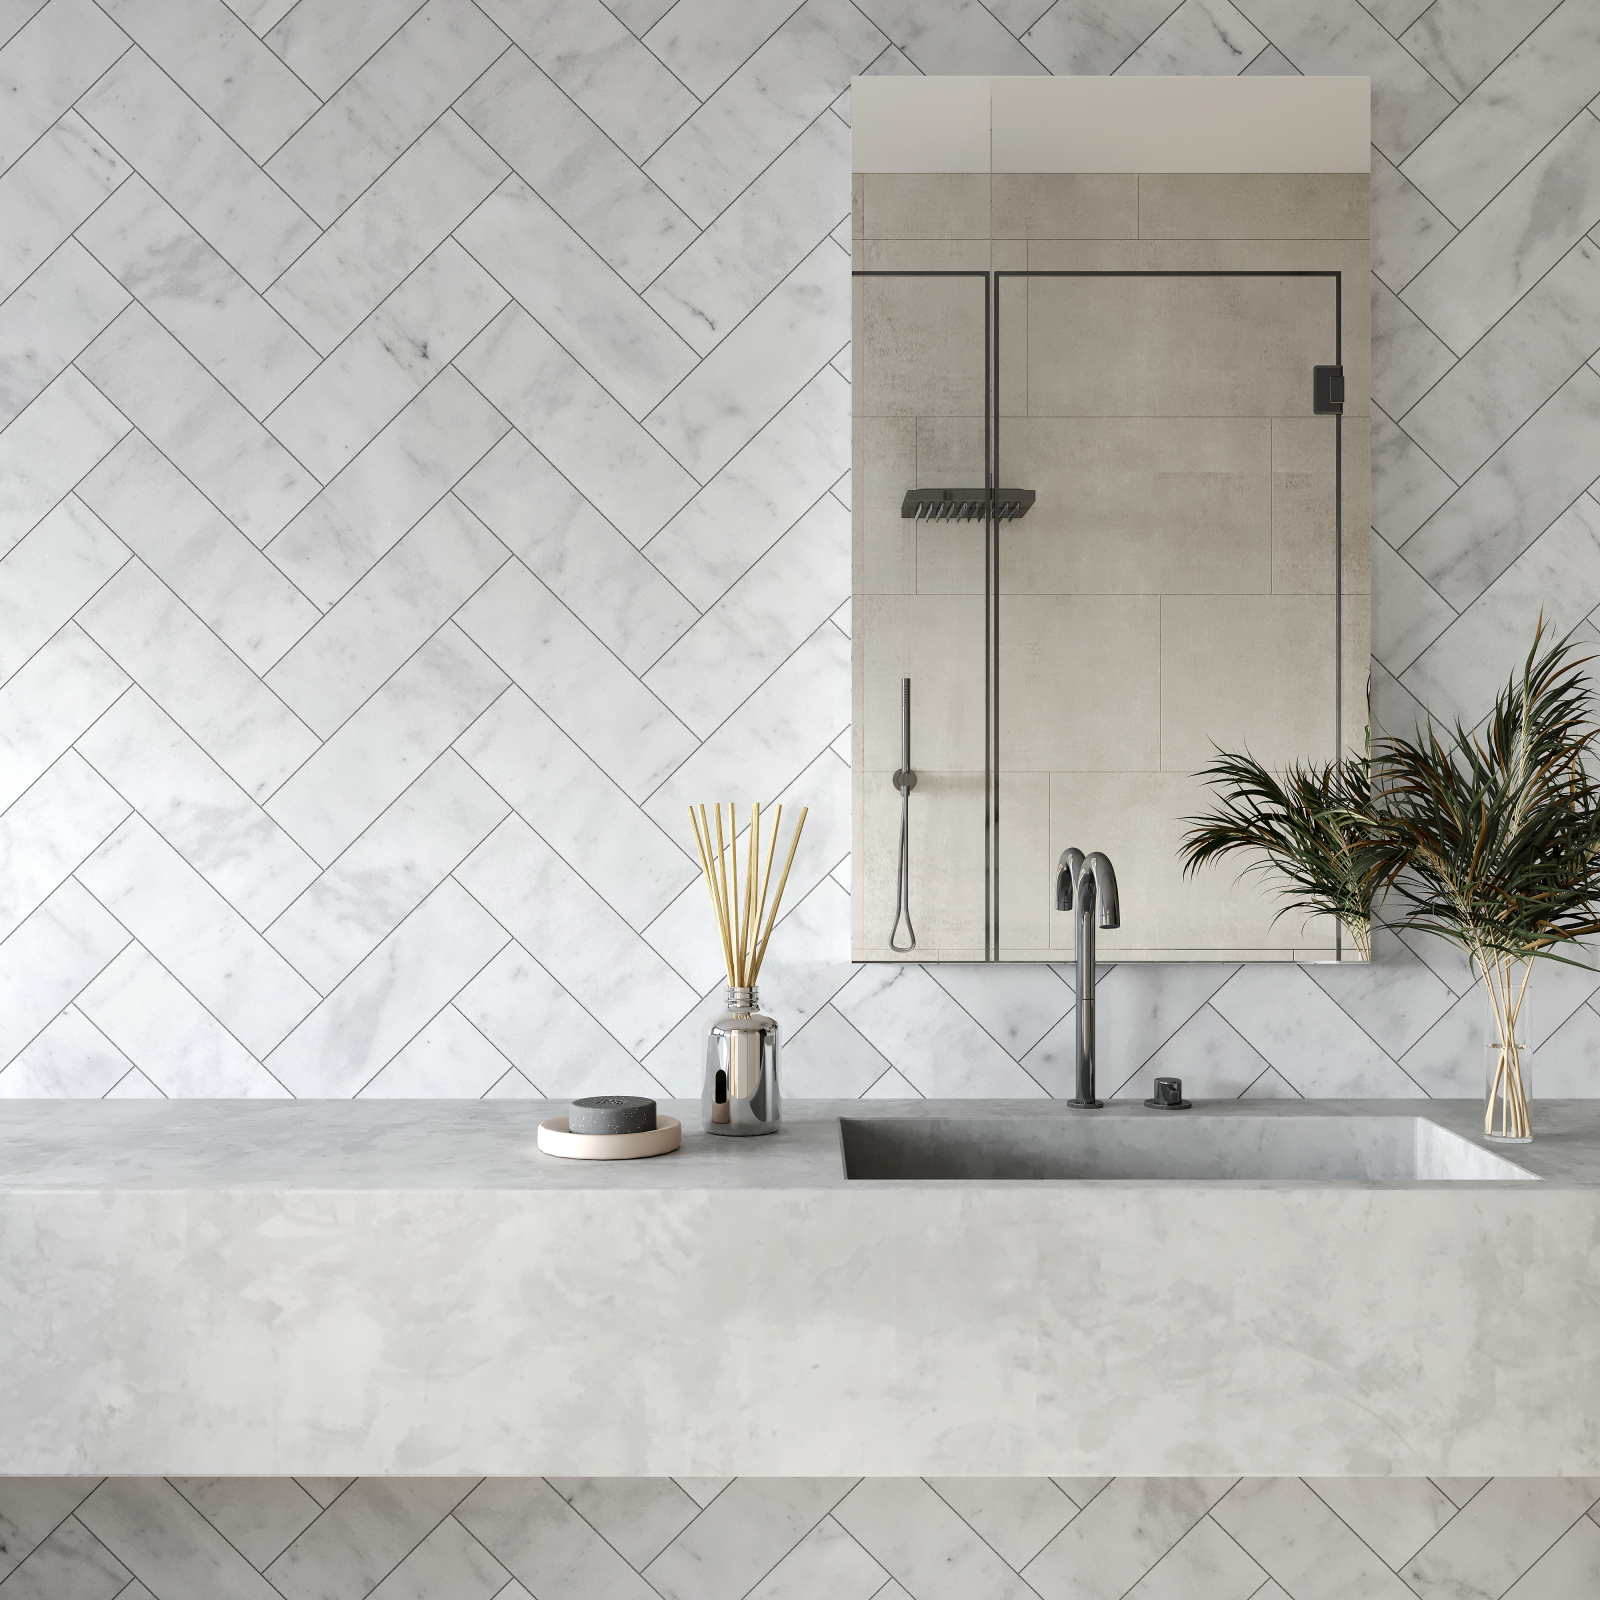
Whether you’re tiling a bathroom, shower, kitchen splashback, or utility room, proper moisture protection ensures your tiled surface lasts for decades without hidden damage. Porcelain tiles themselves are water-resistant, if natural stone is used, then they should be sealed before and during use throughout their life time, and grout lines, wall substrates, and joints are also not waterproof. Without waterproofing, moisture can penetrate behind the tiles, leading to mould, damp, and structural issues.
Why Waterproofing Is Essential
Moisture is the enemy of tiled walls. In wet areas such as showers, wet rooms, and bathrooms, water exposure is constant. Even in kitchens, steam and splashes can slowly work their way behind tiles. Over time, trapped moisture can cause plasterboard to crumble, adhesive to fail, and tiles to loosen or crack. Waterproofing creates a protective barrier that prevents water from reaching the wall structure beneath.
Step 1: Choose the Right Substrate
Before waterproofing begins, ensure the wall surface is suitable for tiling. Standard plasterboard is not ideal for wet areas. In showers and wet rooms, cement backer boards or tile backer boards are the best choice as they are moisture-resistant and stable. For less exposed areas, moisture-resistant plasterboard can be acceptable, but it still requires waterproofing.
The surface should be clean, dry, flat, and free from dust or grease. Any cracks or holes must be repaired before applying waterproofing products.
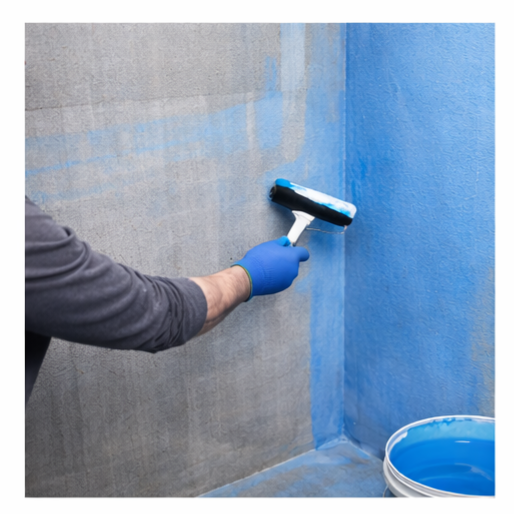
Step 2: Apply a Waterproofing Membrane
A waterproofing membrane is the most effective way to protect walls from moisture. Liquid-applied membranes are the most commonly used and are easy to apply with a roller or brush. These products dry to form a seamless, flexible waterproof layer behind the tiles.
Apply the first coat evenly across the wall, paying special attention to corners and joints. Once dry, apply a second coat at a right angle to the first to ensure full coverage. Always follow the manufacturer’s recommended drying times before tiling.
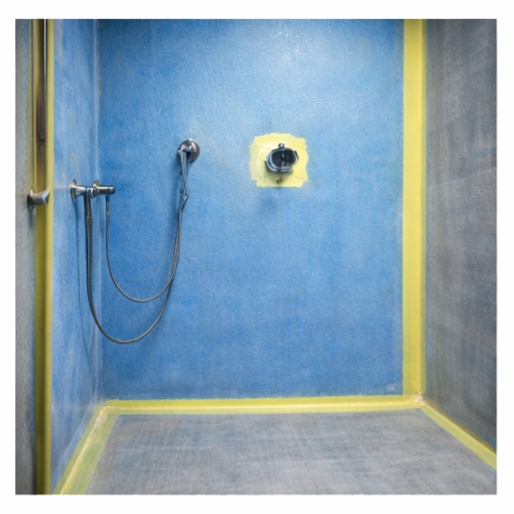
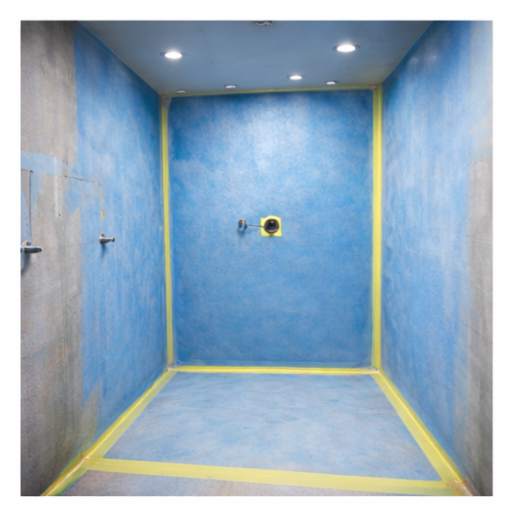
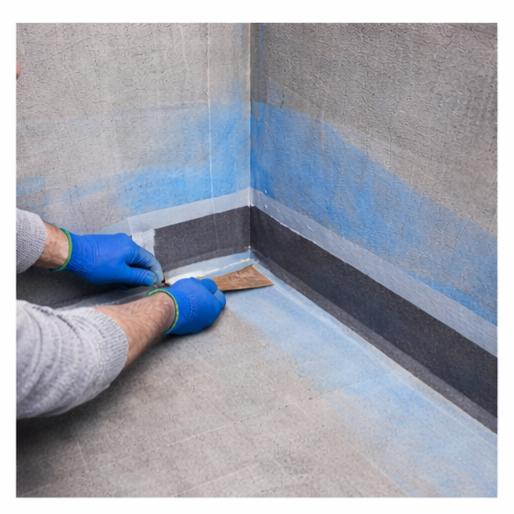
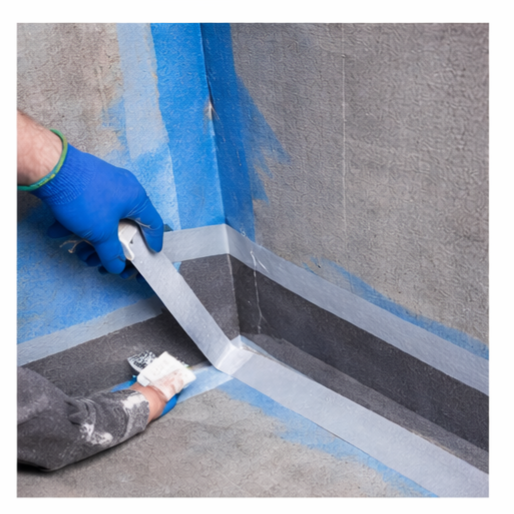
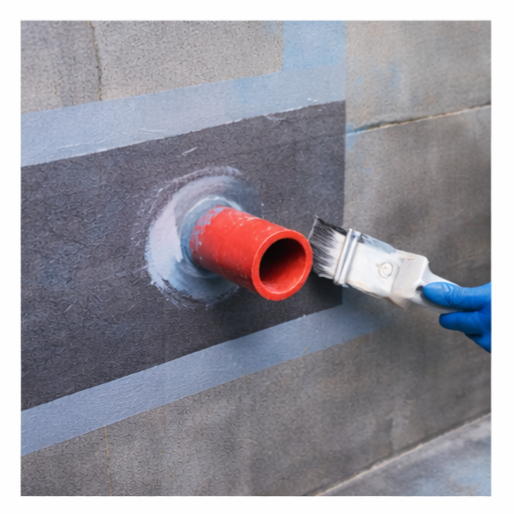
Step 3: Seal Corners, Joints, and Penetrations
Corners and wall joints are the most vulnerable points for water penetration. Waterproof tape or reinforcing fabric should be embedded into the wet membrane at internal corners, wall-to-floor junctions, and around pipe penetrations. This reinforces the membrane and prevents cracking due to movement.
Shower valves, pipe outlets, and niches must be fully sealed to avoid future leaks.
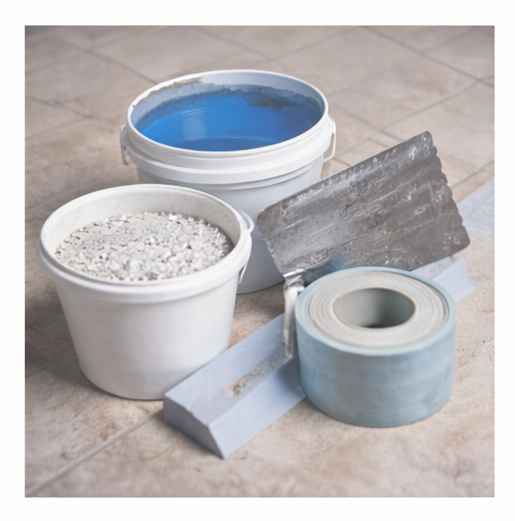
Step 4: Use the Correct Adhesive and Grout
Once the waterproofing has cured, use a high-quality, flexible tile adhesive suitable for wet areas. This allows for slight movement without cracking. For grout, water-resistant or epoxy grout offers superior moisture protection compared to standard cement grout.
After grouting, applying a grout sealer adds another layer of defence, especially in areas exposed to frequent water.
Step 5: Don’t Skip Curing Time
Rushing the process can undo all your hard work. Allow waterproofing membranes, adhesives, and grout to cure fully before exposing the tiles to moisture. This ensures maximum strength and long-term performance.
Final Thoughts
Waterproofing walls before tiling is not an optional extra—it’s a necessity. A properly waterproofed wall protects your home from costly repairs, unsightly mould, and tile failure. By using the right materials and following correct installation steps, you create a durable, moisture-resistant foundation that keeps your tiled surfaces looking great and performing well for years to come.
 REVIEWS


